
Even though Microsoft has brought in a plethora of visual changes and improvements in Windows 11, you still can do an umpteen number of tweaks to boost your system performance, like disabling startup programs, removing bloatware, clearing cache, to name a few.
This article will show you how to disable visual effects in Windows 11 to speed up your experience. But you may wonder if it imparts a significant change in system performance. Well, it can. The visual effects include animations, mouse shadows, etc., and these effects are enabled by default. As they consume a part of your system resources, it affects the performance. Disabling the same can give a slight push in performance and battery life, especially on older machines.
Contents
How to Disable Animation Effects in Windows 11
If you feel your Windows 11 PC is sluggish, then use these steps to turn off the visual effects.
- Open the Settings app by pressing Windows key + i. Otherwise, you can open Start, search for “Settings”, and click on the icon.
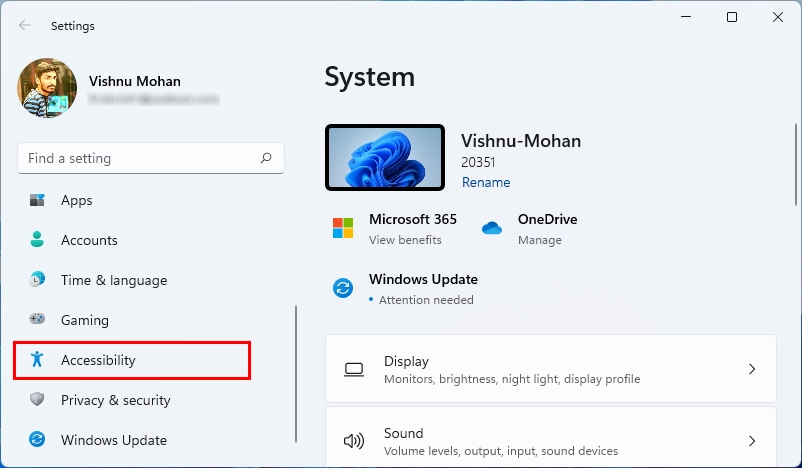
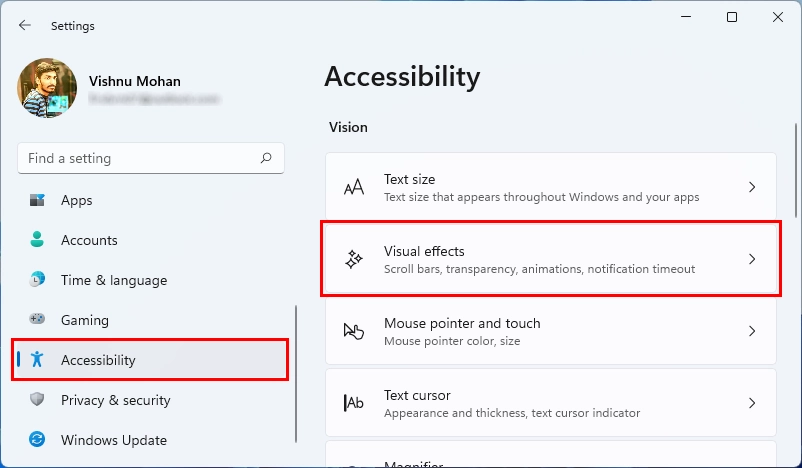
- When the Settings open up, scroll down in the left sidebar and click on Accessibility. In the right pane, click on Visual effects.
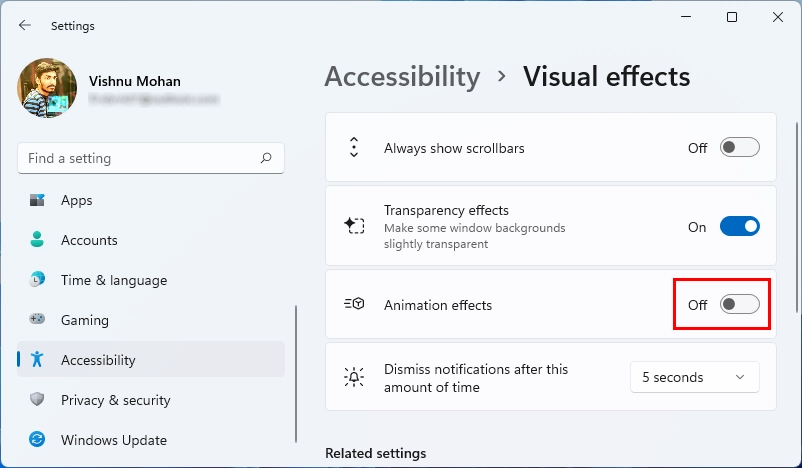
- On the next screen, flip the toggle that says “Animation effects”.
That all you need to do. If you change your mind later, return to the same settings and turn the toggle to ON.
How to Disable Visual Effects in Windows 11
While the above-explained method is primary, and of course, it works. But how about going a bit advanced? Well, here is another method to turn off the visual effects on your PC. And, this time, you will deal with even more tweaks and not just the window animation effects.
- Firstly, Open the Run dialog (Windows key + R) and type
sysdm.cpl. Click OK. - It will open up the system properties window. Go to the Advanced tab and click on the Settings button under the label “Performance”.

- In the next window that appears, choose Adjust for best performance option. It will disable all the advanced visual effects in Windows 11.

But there is a drawback to this method. Can you figure it out from the screenshots?
Well. If you let Windows optimize for the best performance, some elements in your display will be affected. Screen fonts, for instance.
The smooth edges of screen fonts will be disabled, and it may seem awful. So, to get rid of this issue while not reverting to other options, here is the way you need to set things up.
Choose the radio button beside Custom, check the option that says “Smooth edges of screen fonts, ” and clear all other options. Click Apply and then OK.

It will disable all other visual effects except smooth edges for fonts and make your fonts crisp and readable.
Turn Off Visual Effects to Make Your PC Run Faster
Stopping the animation and other visual effects can make your PC run slightly faster. However, once you disable that, the display optimization would not be that great, and the fonts rendering may seem a bit substandard.
If you are using an older machine and concerned about the performance and speed, your best would be to disable those visual effects and free up a part of your system resource.
And now, speak your heart out and let your comments motivate us to produce more helpful content for you.


