
If you have a relatively new PC, it likely has a TPM chip attached to its motherboard. If so, you can enable TPM in BIOS for fulfilling the minimum system requirements to install Windows 11 operating system. In our previous article, we’ve discussed a few methods to check Windows 11 TPM compatibility on a system. Even if your device may have a Trusted Platform Module Chip hardware physically it doesn’t necessarily mean that it’s enabled by default. That’s why we’ve come up with this guide to show you how to activate TPM in BIOS on some common PC brands.
If you want to install Windows 11 on your system, and the Microsoft PC Health Check App is saying that your device can’t run Windows 11, even you know it meets the requirements, you can quickly enable TPM in BIOS.
Before getting into the process of activating TPM in BIOS, we assume that your PC is TPM supported meaning you have a TPM chip physically on your device. If you are not sure about that, read our guide and come back to this article after checking.
In case your PC doesn’t have a TPM chip, follow our guide to install Windows 11 without TPM and secure boot.
Contents
How to Enable TPM in BIOS HP
- Restart your PC and then Enter the BIOS on startup by pressing Esc or F10 key.
- Navigate to the Security tab.
- Activate TMP Device and TMP State by toggling it into Enable.

- Finally, save and exit the BIOS by going to the Exit tab.
That’s it! You have successfully enabled TPM in BIOS on your HP desktop or laptop computer.
How to Enable TPM in BIOS Lenovo
- First off, restart your PC and enter the BIOS by pressing the F2 key (use the Novo button if F2 didn’t work).
- Once inside BIOS, navigate to the Security tab.
- For Intel Motherboards, enable the Intel Platform Trust Technology option.
- For AMD Motherboards, enable the AMD Platform Security Processor option.

- Press the F10 key to save and exit.
This is how you can activate TPM in BIOS on Lenovo systems.
How to Enable TPM in BIOS Gigabyte
- Reboot your PC and enter the BIOS by pressing F2 or DEL during startup.
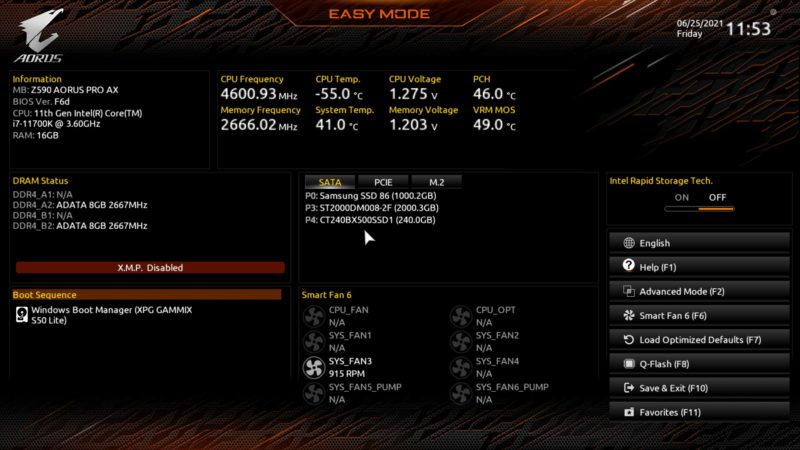
- Change the BIOS into Advanced Mode (if currently in Easy Mode) by pressing F2 or by clicking the Advanced Mode option in the sidebar.

- Go to Settings > Miscellaneous. You need to double-click on the Miscellaneous option to enter.

- Here, enable the Intel Platform Trust Technology (PTT) option which is the TPM feature in Intel motherboards. On AMD boards you will see this feature named FTPM.

- Restart your PC by navigating to the Save & Exit tab.
- For enabling Secure Boot, go to the Boot tab and enable the Secure Boot option at the bottom. Just click on it and change the setting from ‘Disable’ to ‘Enabled’.

How to Enable TPM in BIOS MSI
- First, restart your PC.
- Press the DEL key (BIOS activation key) to enter the BIOS during startup. If DEL doesn’t work, use the BIOS key mentioned on your screen during the startup.
- Now, press the F7 key to enter the Advanced Mode from EZ mode.
- Click the Settings option found on the left side.
- Navigate to Security > Trusted computing.
- Enable the Security Device Support option as shown in the screenshot below.

- Press F10 to save and exit.
Congrats! that’s how you can switch on TPM in BIOS on an MSI device. Now install and get the taste of Windows 11.
How to Enable TPM in BIOS Dell
To tun on TPM in BIOS on a Dell system follow the below steps.
- Restart and open the BIOS in your dell laptop by pressing the F2 key.
- In the BIOS, navigate to the Security tab.
- Now, Enable the TPM Security option and Activate the TPM Activation option.

- Once done, go to the Exit tab and save and exit BIOS.
And you have successfully activated the Trusted Platform Module in BIOS on your Dell computer. Now, enable the secure boot and start installing Windows 11.
How to Enable TPM in BIOS Asus
To activate TPM in Bios on Asus PC/laptop, follow the below-given steps.
- Firstly, as usual, restart your PC and open the BIOS using the F2 or Delete key.
- Navigate to the Advanced tab.
- Find the option Trusted Computing.
- Under the trusted computing, enable the TPM SUPPORT and TPM State options as shown in the screenshot below.

- Finally, click on the Exit button at the top right corner to save and exit.
Well done! This is how to turn on TPM in BIOS of an Asus device.
How to Activate TPM via Windows 10
To enable Trusted Platform Module (TPM) on your machine via Windows 10, use the below steps:
Warning: Modifying the firmware settings incorrectly may prevent your device from starting up properly. So, proceed only if you know what you are doing.
- Open Settings.
- Select Update & Security.
- Click on the Recovery option.
- Under the Advanced startup option, Click on Restart now.

- Then click on Troubleshoot.

- Then Advanced options.

- And choose UEFI Firmware Settings (You won’t see this option if you have a Legacy BIOS).

- Click Restart.

- Now, open the security settings page (refer to your manufacturer’s official website to find the security settings as it may vary depending on the brand and model).
- Inside the Security Settings, select the Trusted Platform Module option and hit Enter.

- Choose the Enabled option and press Enter.

- Finally, save and exit the UEFI settings.
- Restart your PC.
Once your system reboots, the TPM security chip will be enabled and you can configure it as per your requirements to meet the Windows 11 system requirements.
How to Turn on TPM via Boot Sequence
In case if you don’t have access to the desktop or if it is a new system, enabling TPM via boot sequence will work for you.
To land on the firmware settings to activate the TPM chip on your machine, you can follow the below instructions:
- Turn on your PC.
- Look at the splash screen to know what key you need to press to enter the firmware settings.
- Press and hold down that key until you enter the setup mode.
- Now open the security settings page.
- Choose the TPM option and hit Enter.
- Choose the Enabled option and press Enter.
- Finally, save and exit the UEFI settings.
- Restart your PC.
Once you complete the above steps the TPM will be enabled on your machine.
In case you find difficulty in accessing the firmware, here are some hotkeys to access the firmware of popular computer brands.
| Computer brand | Key |
| HP | Esc or F10 |
| Lenovo | F1 or F2 |
| Dell | F2 or F12 |
| Acer | Del or F2 |
| Asus | Del or F2 |
| Samsung | F2 |
| Toshiba | F2 |
| MSI | Del |
| Surface | Press & hold down volume up button |
Wrapping up
Hopefully, by now you know how to enable the Trusted Platform Module chip on your computer via BIOS, Windows 10 settings, and Boot sequence. If you have any doubts, feel free to comment below.


