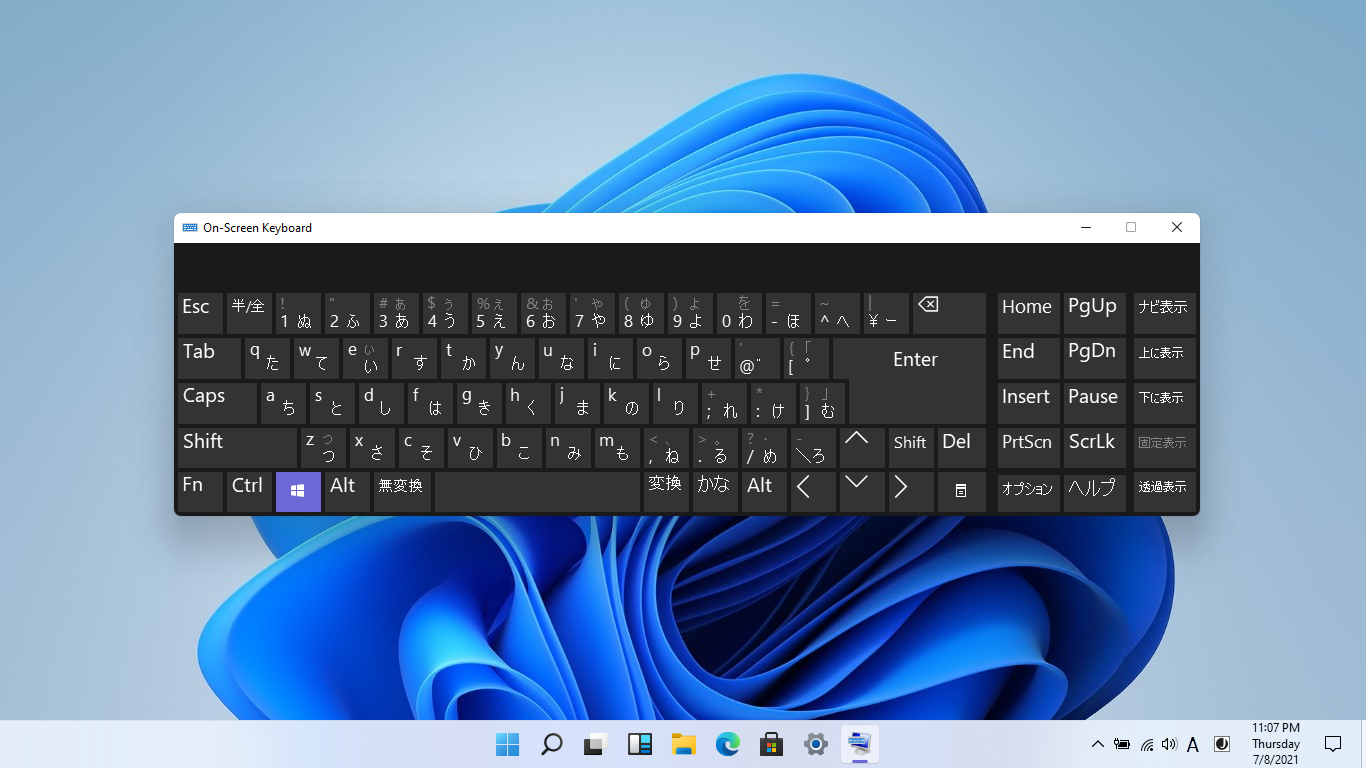
There are a large number of users around the globe who are in need to use foreign languages on their computers. If you are one of those, who want to install Japanese keyboard on Windows 11, we’ve covered it for you!
In this guide, we’ll walk you through the exact step-by-step process and show you how to install Japanese keyboard on Windows 11 on your PC/laptop. As it doesn’t involve any downloads or installation from external sources, this is gonna be a piece of cake for you. And once you install it, you’ll be able to switch between the default English and Japanese keyboard.
Contents
Install Japanese Keyboard on Windows 11
Basically, there are three methods by which you can use a Japanese keyboard layout on your system without changing to a Japanese locale on Windows 11 OS.
- Install Japanese keyboard using language settings.
- Type Japanese language using the native keyboard.
- Use a physical Japanese keyboard on Windows 11.
Follow the steps to install Windows 11 Japanese keyboard.
- Open Settings > Language > Add a Language.
- In the next window, type “Japanese” and it will list the Japanese keyboard.
- Choose it and click on Next.
- In the Install language and features window
- Un-check the Install language pack and set as my Windows display language options.
- Only enable these options if you really want to use Voice and Handwriting for Japanese work.
- No, click the Install button and you’ll be done!

On you click on install, it will start downloading the Japanese IME for setting up the Japanese keyboard and install it on your computer. In step 4, we’ve unchecked the Japanese language pack installation because it will change the display language of the whole Windows 11 OS and that may become an issue. But in case you want to use the Voice and handwriting features.
Finally, if you click on the language bar icon from the system tray or using the shortcut Win + Space key, you can switch between English and Japanese keyboards.
How to Type in Japanese on Windows 11 using English Keyboard
To type in Japanese on Windows 11, Microsoft offers Japanese Microsoft IME. When to click on the language option from the system tray and select Japanese language, you will the alphabet A meaning you are still using the English keyboard. To change it to Japanese, just click on it once.

When you right-click on the icon, a new contextual menu will open up from where you can choose the different keyboard variants. You can choose Katakana or Hiragana keyboards. It’s totally up to you.
If you don’t know, Katakana and Hiragana are two different Japanese syllabaries. You can also type Japanese words in Hiragana, Katakana, and Kanji using an English keyboard on your Windows 11 OS.
Basically, there are 2 methods to type in Japanese characters, Romaji input, and Kana input. For Japanese people, Romai input is the preferred method.
FYI, Romaji input is the Romanized version of the Japanese language, whereas Kana is the phonetic symbol.
Apart from that, the input tool also offers an IME Pad by which you can draw the Japanese characters and it will automatically recognize it for you.
Configuring Touch Keyboard for Japanese
You can also configure the touch keyboard for the Japanese language through Settings > Time and Language > Select the Japanese language > Options > Microsoft IME > Options.
Here you can add words, turn on cloud suggestions, etc. If you plan to configure this on a touch keyboard, it is recommended to use the Kana 10 key as the preferred input mode. These are generally used on smartphones which allows you to swipe from the key in a particular direction to type the required Japanese character.
Furthermore, for improving the typing speed you can also switch between Flick input and Flick and multi-tap input.

Note that while using this, turn off the Kana input method. Otherwise, it will be difficult to type long sentences in Japanese.
Use Japanese On-Screen Keyboard on Windows 11
To use Japanese on-screen keyboard on Windows 11, use these steps:
- Go to Settings > Time & Language > Language.
- Under Preferred languages click on Japanese > Options.
- Find the Regional format section and click on settings.
- Then under the Regional format choose the Japanese language.
- That’s it.
Now onwards whenever you open the on-screen keyboard you will see Japanese characters so that you can easily type in the Japanese language on your Windows 11 computer.
How to use Japanese Physical Keyboard on Windows 11

Just in case you have a physical Japanese keyboard with you, all the processes will be simplified. The process of setting up and using a physical keyboard is pretty straightforward.
- Go to Settings > Time and Language > Select the Japanese language > Options > Change hardware keyboard layout.
- Here you will have the option to switch between the Japanese keyboard (106/109 key) and the English keyboard (101/102 keys).
- Once you select that you will need to restart your PC to take the effect of the change.
That’s how to add a Japanese keyboard in windows 11.
Final Words
So this post showed you how to get and install Japanese keyboard on Windows 11. Now you’re all set and it’s time to practice Japanese typing right away. Also, don’t forget to comment if it helped you.


