Changing the default startup folder in Windows 11 File Explorer is a bit tricky if we don’t know the correct method. File Explorer is one of the most frequently used apps on a Windows PC, and the recent updates in the OS resulted in substantial tweaks in many settings and how we did it in previous versions of Windows.
By default, the File Explorer will open the ‘Home’ or ‘Quick access’ window. So you always need to navigate to your desired folder from there, which usually requires several clicks. To minimize the number of clicks and open the folder right away, you’ve got to set that folder as the default startup folder in the File Explorer. In this article, we are going to see how to do just that.
Change Default Startup Folder in Windows 11 File Explorer
- Open the File Explorer by using the shortcut
Windows + Eor get it from the Search bar.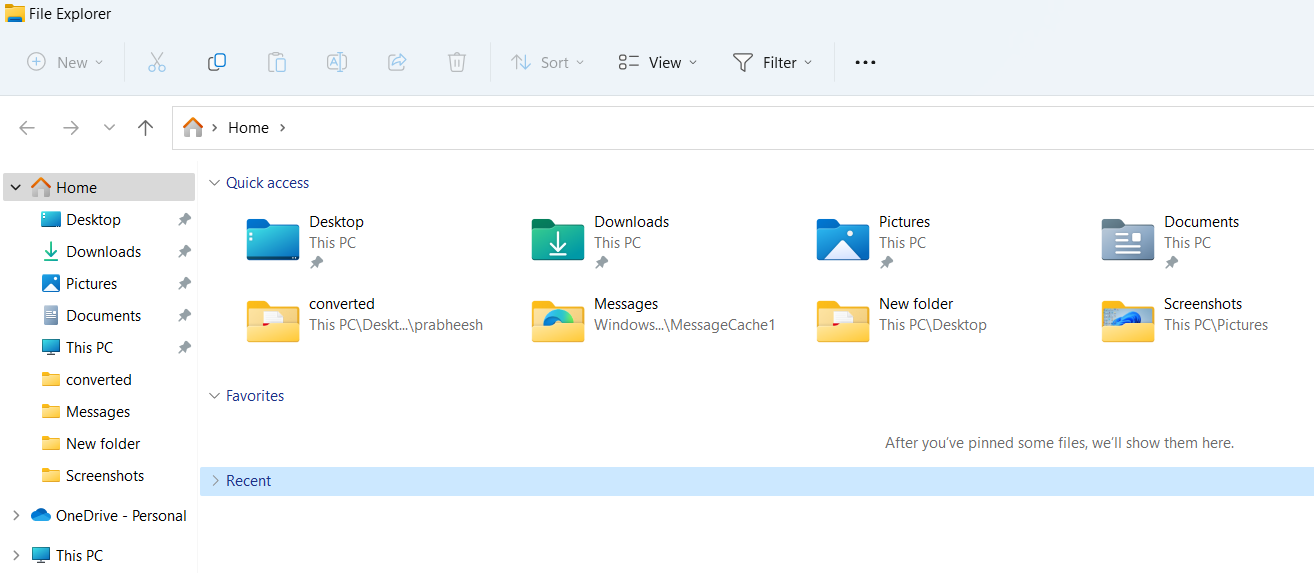
- The File Explorer will be launched directly to open Home in the Explorer as default.
- Click on the 3 dots as shown in the top menu bar and select Options from it.

- The ‘Folder Options’ window will be seen as the next. Click on the dropdown menu available on the right side of the option ‘Open File Explorer to’.
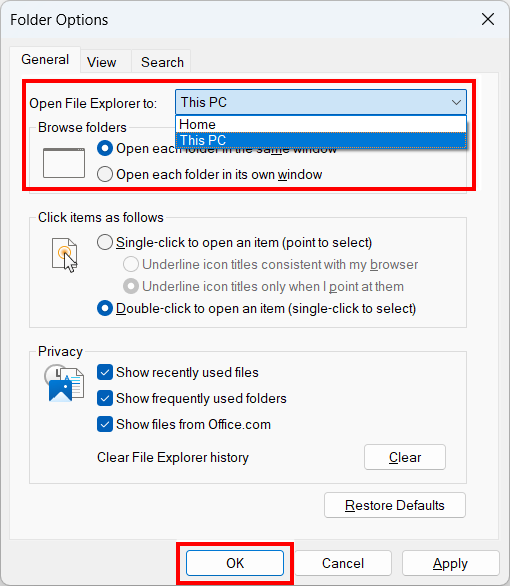
- Change the default Home to This PC and click OK.
- Close the Windows 11 File Explorer and relaunch it again.
- Now the Windows file explorer is directly opened to This PC.
- Now, it’s time to set our favorite folder or frequently visited one to open without any searches.
- Go to the location where your targeted folder is.
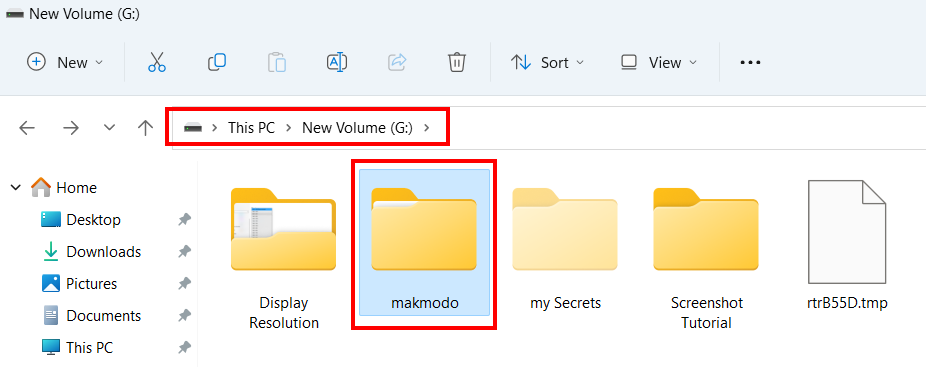
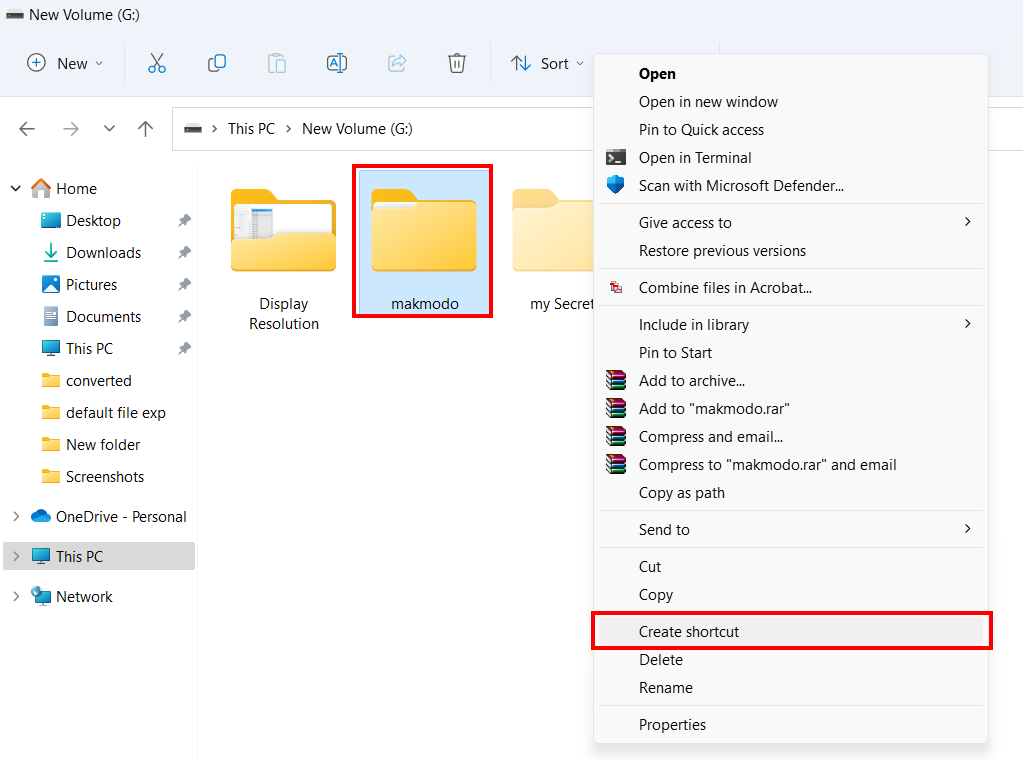
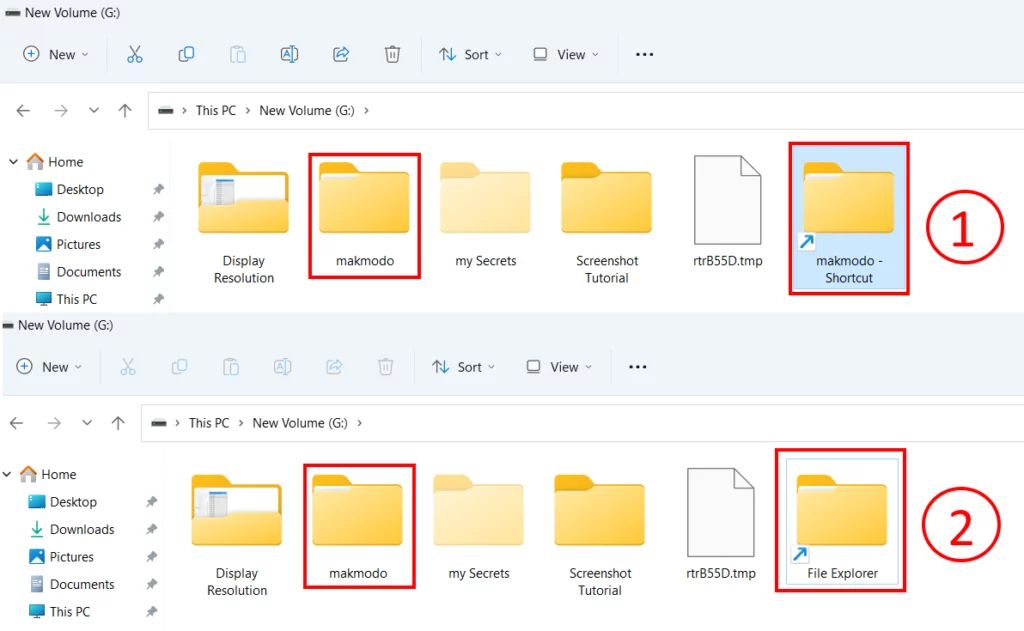
- Now create a shortcut for the same folder by right-clicking on the targeted folder and clicking on Create shortcut.
- Now rename the shortcut link to the name as ‘File Explorer’.
- Right-click on this folder and click on Properties.
- Click on the Change icon button to change the icon for this folder.
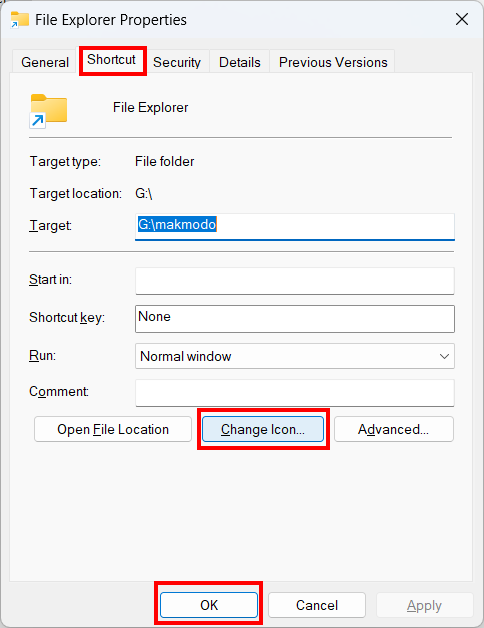
- Search the File Explorer icon by typing the given code in the field provided to search.
%windir%\explorer.exe - After typing the above code, press the Enter button on the keyboard. Now click OK after the desired icon is selected.

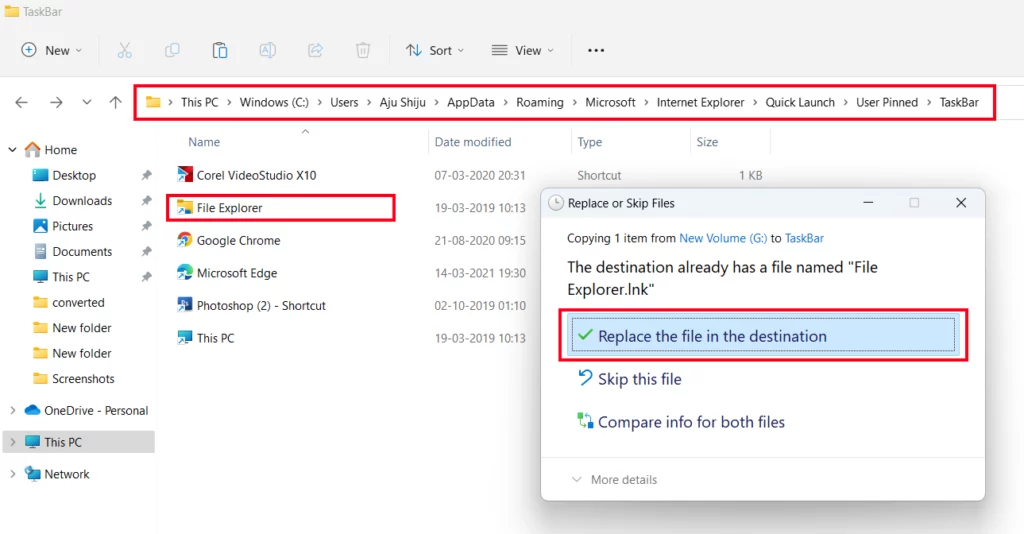
- Now in the address bar of the File Explorer, paste the given path as given below. Do not forget to change ‘Username’ (check it from your pc) in the given path. Follow our guide on how to unhide files in Windows 11 if the required system files are hidden.
C:\Users\UserName\AppData\Roaming\Microsoft\Internet Explorer\Quick Launch\User Pinned\TaskBar
- The original File Explorer link is available there.

- Now copy the link by right-clicking on the File Explorer folder and paste it somewhere else to keep as a backup so that you can bring it back in the future if required.

- Now go on to the early created File Explorer (copy of your targeted folder) shortcut link and copy it.

- Now paste the copied link to the location given.
C:\Users\UserName\AppData\Roaming\Microsoft\Internet Explorer\Quick Launch\User Pinned\TaskBar - This will replace the original file explorer with created ‘File Explorer’.
- Close all file explorer windows and relaunch it to see file explorer opening to your desired folder.

- That’s it. You can change all this to default things by pasting the original file explorer link (which we kept as a backup) in the location User Pinned > Taskbar directory in the future.
A Single Click to Open Your Favorite Folder!
By this tutorial, we hope your favorite folder is the default startup folder on your Windows 11 PC. This will not be a great deal for regular users, but this method will really help power users who frequently visit a specific folder.
If you have any further queries related to this topic, do not hesitate to share your valuable thoughts in the comment section below.